Here it is, the piece of the week !
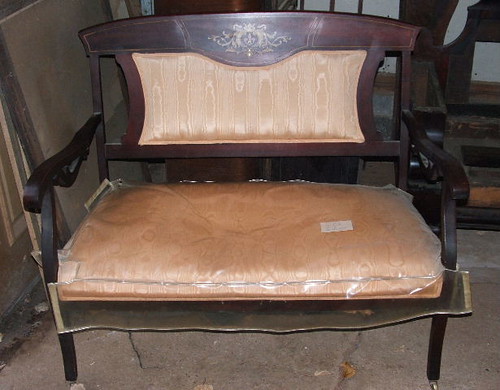
I figured since I am the Chairman why not start with a Chair for my first Blog project piece.. So we picked this up from a customer a few weeks back. Its a swell 1920's inlaided Settee. These pieces are always interesting to work on.(note interesting really means pain in the butt)
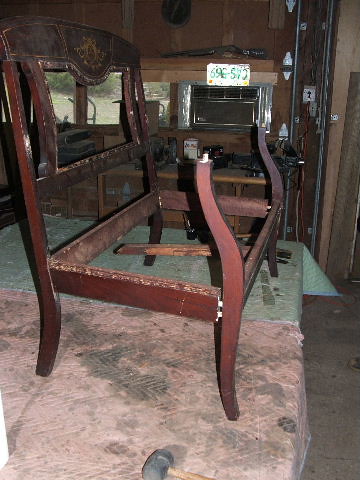
I am going to cover some of what was done to it today.. As you can see it came to us with its original plastic seat cover. Its so funny that folks really do use these things.. I thought about ebaying it(plastic cover), but then decided to toss it.
Anyway, this will be a complete restoration job, repair, re-glue & then have the Upholsterer re-spring it & add the new fabric.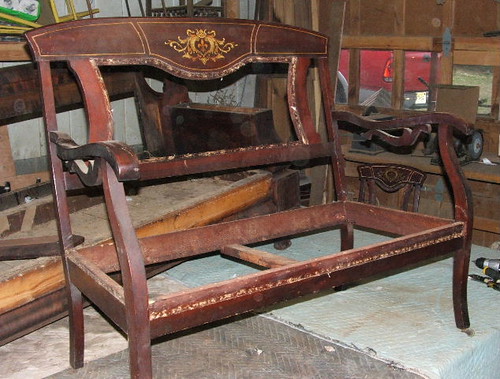
The first part of the process is to do the repair. What I do believe is if your going to do it , DO IT RIGHT. By doing it right, I mean you need to start by re gluing, No not with gorilla glue, no Sheetrock screws or nails, just good old fashion brown glue a few good clamps.
As you can see we removed all the fabric first one of the biggest chores. Can you say 8 billion tacks, this is were your umpa lumpa comes in handy or first mate tell him/it or her to do it. Its really important to do this if your reupholstering the piece. This may be the last time you can re-glue the structure correctly for many years. If you don't you'll end up with a beautiful, yet wobbly piece of furniture..
 Here is how I like to do it..
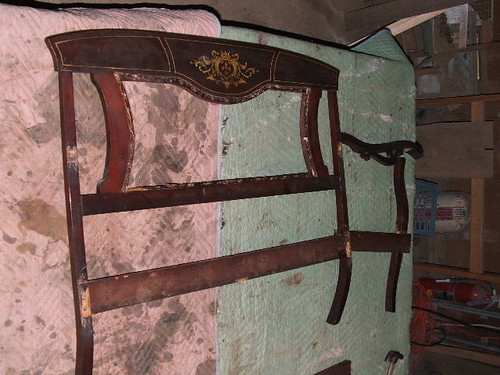
 We disassemble the whole piece. Yep take it apart, if its an old piece it should come apart pretty easy. You'll need a nice soft/rubber mallet to help loosen those old joints & maybe a vise with a little leather in its jaws. Also watch out for nails & screw from any 1/2 done repairs from the past, nothing like blowing a joint up cause some clown put a nail in it. The only way to reapir a joint in anything is to glue & clamp it ! Nails & screws are a short term fix.
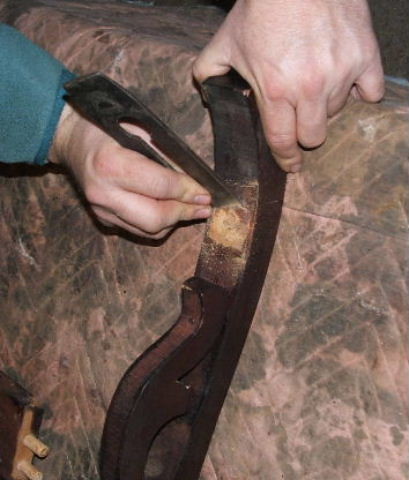
After I take it apart, I like to scrape off all the old glue make sure the holes & dowels are pretty clean. An old chunk of glue in a dowel hole could jam you up later. Also I like to put a little slot in the old dowels. The new glue will create an air pocket inside the joint that could damage the joint or make really hard to clamp it later.
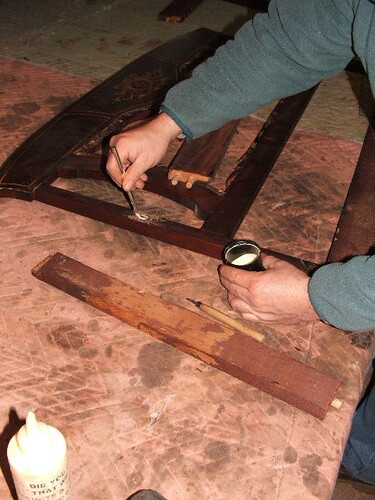 So its time to glue ! "the home stretch", this is good cause ,I am already gettting bored. So this is the fun part wooo whoo ! Grab your plumbers brush & cup of your glue of choice & start gluing ! Make sure you get glue on both parts of the joint. Not to little & not to much.
After I take it apart, I like to scrape off all the old glue make sure the holes & dowels are pretty clean. An old chunk of glue in a dowel hole could jam you up later. Also I like to put a little slot in the old dowels. The new glue will create an air pocket inside the joint that could damage the joint or make really hard to clamp it later.
So its time to glue ! "the home stretch", this is good cause ,I am already gettting bored. So this is the fun part wooo whoo ! Grab your plumbers brush & cup of your glue of choice & start gluing ! Make sure you get glue on both parts of the joint. Not to little & not to much.After you have applied glue to each joint its time to reassemble it. Pop it back together looking for a loose fit. You will have glue dripping everywhere, no worries more will come when it gets clamped. Have a paper towel & water handy.
Clamping I like to start with the sides.. Pop one on either side & slowly start to tighten them , Go from side to side, closing those gaps evenly. Take your time & make sure every thing is even. If its not you could end up with a cockeyed chair.
So below you will see the clamped piece, "frankensteined" On this piece we used 7 clamps everything went back together perfectly, we added the corner blocks back in & put it on a level floor. The clamps will come off in about 10 hrs or so.
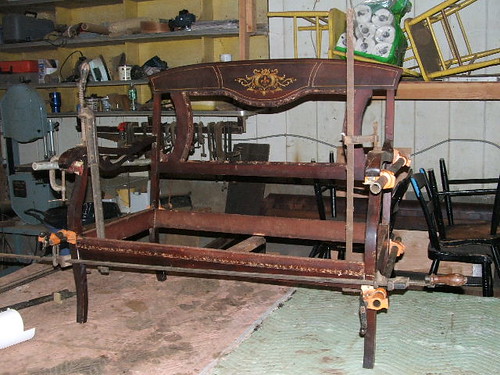
Clamped & ready
So that's part 1 Of my inlaid chair saga, man this blogging crap can be a pain in my ass. The picture adding & writing is crazy, I need to get away from the puter & get into my shop where I know its safe. If you have any questions please post them or shoot me an email chairguy5@gmail.com
~Chairman
No comments:
Post a Comment