Showing posts with label Meyersville NJ. Show all posts

Saturday, September 15, 2007

STOP don't buy that new furniture, get an antique !

Please stop buying new furniture. This will be a quick blog but i hope it makes you think.. I repair and restore furniture for a living right, so i see allot of things.


Here is quick look at a brand new "Lane" desk (1800.00 new). It was dropped off a moving truck landing on its leg. No the leg didn't break the side piece broke.
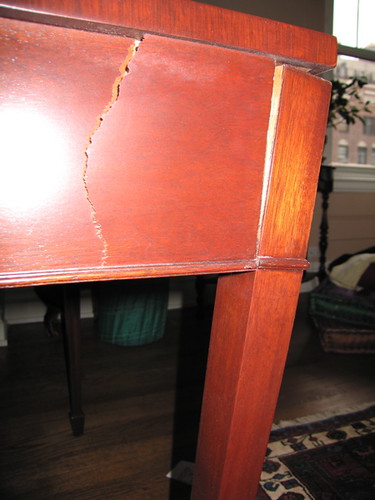

It cracked open like a pinyatta at a birthday, but instead of candy all that came out was paper.
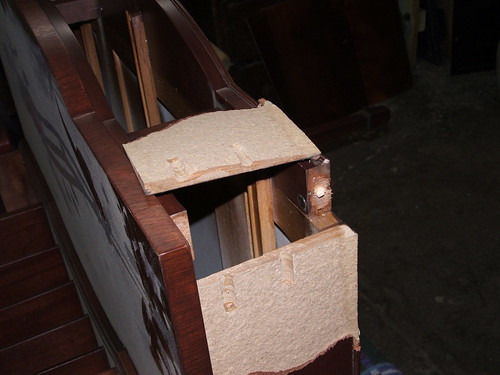


Yes paper, its crazy but this brand new piece of "fine furniture" was nothing but mahogany veneer on Masonite or pressed paper.. Check out the picture, its sad.


So before you buy new consider buy a used piece of furniture and restoring it. Anything pre 1980 will be better then anything made today. Think about this; you will pay or can pay 2k and up for just a good quality dining room table. For 1000,00 you can buy a complete used dining room set you can restore it for less then a whole new dining room set and you will still have a better quality set for cheaper.

But If you do decide to buy new no worries the chairman can fix it..

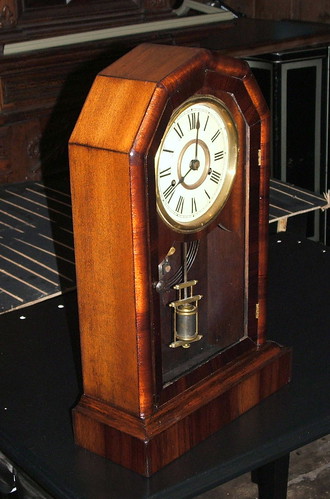
tic toc here is the finished clock


It been so so long, I know you have been waiting to see what happened to that clock! Well here it is! Enjoy.. Goto my last blog to see the "before" pictures
At the end of the day we had a beautifully restored and perfectly working Victorian clock!


Wednesday, July 4, 2007

Antiques Guy Gone Wild

Happy 4th O’ July! Woo Hoo! Sorry for the false advert title.
I wanted to pop in for a bit and do a little writing, point out some changes to my blog., as well as, talk about a piece I picked up this week.
On the right I added some picture badges. These badges will feature pictures of pieces I have restored, I’m selling and some of the funky stuff around my shop. If you click on them, you can go to my flickr page and see every thing up close. The flickr page is probably the best place to see current pieces for sale as my web site doesn’t get updated to often… go figure.
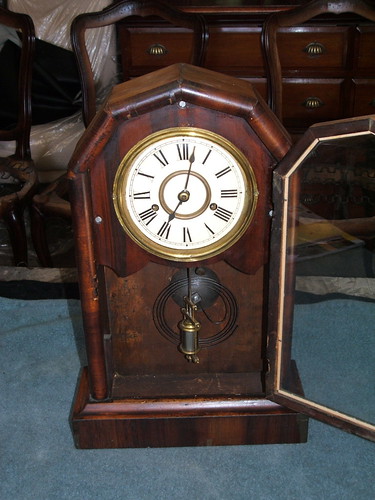
Here is a great little piece for the week. It’s a sweet little Rosewood Empire Mantel clock. We will be doing the full Monty on this one. Right now I am in the process of chasing down an estimate for the clock repair. My old clock guy was a retired guy, that now has really retired.
It so funny how many of my sub contractors are retired folk that have found pleasure in odd furniture repair stuff. Bill P. the caner/rusher, Mr. Lynch the clock fixer and Mr. Lee the veneer repair/Carver-guy. Its really a cast of characters around the shop, not to mention the random folks that drop by to chew the fat. I really dig all the great old random stories.
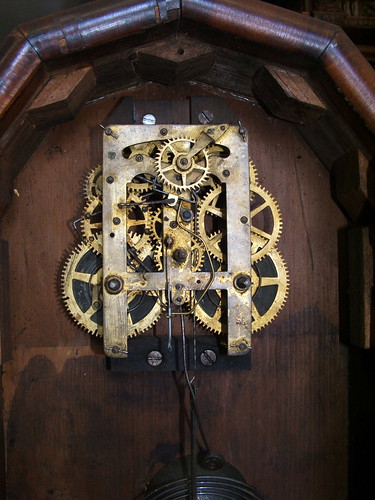
So here are a few pictures of the clock to be restored. It should be a relatively easy job. All it needs is a minor veneer repair and then refinishing. Hopefully the clock isn’t to far gone and can be repaired.
On that last note, “The Cast Characters”, I was at a customers the other day, the custies were both telling me how I need my own antique restoration show. They said, they thought I would be perfect so please tell anyone you know the produces at the discovery channel or on one of those home improvement channels. It would be great to harass Martha Stewart every now & again. Come on, a 37 year old tattooed antique guy… It would be perfect. I even come with my own natural eccentricities. I don’t have to make anything up. I’ve even heard it’s pretty entertaining to watch me reprimand my poor little helper. So have your people contact my people, well I don’t have people, so contact me.
Happy 4th,
Chairman

Monday, July 2, 2007

The Chairman Update

Howdy kids !
Yep it’s the Chairman, guy , dude. I am back for what I am hoping this will be a semi long haul!
Things have changed since I last Blogged baby..
I will Give you a quick Hits list !!

1) Meyersville developer update, It appears the developer has backed off for now. We believe he is waiting for the dust to settle (people to forget), as well as waiting for the Master plan changes to see if it will benefit him.
I started a low key campaign to create a park on two properties that are for sale, but have not been purchased by the developer. The park is a great idea the rub is trying to get the town to buy it. I will update the blog about this as wee move on..

2) The biggest news ! On 4/27/07 The Chairman got hitched .. He was married in Maryland, at The Gramercy Mansion . The Gramercy had wonderful Antique all around the building. It was the perfect night, everything went off without a hitch. We headed to Costa Rica for the honey moon that was incredible, if you haven’t been you need to go !


3) Work since the wedding has been insane I need to update picture & information. I will hopfully get this all done this week. I have some really great pieces to be restored in the shop. If you go to the feeds on the right of this page you can go to my Flickr account for Wedding, Costa Rica and work pictures.

Chairman & Bride in Costa Rica!


That's a quickly update.. Check out my website http://www.chairmanrestoration.com/ ALso the photos on the right.

Cheers
Chairguy.

Saturday, April 14, 2007

Big Doings in my little Town of Meyersville

WOW, I can't believe I am writing !
My head is starting to clear & I feel the need to write..

Huge Update..
Meyersville My home town and the location of my shop is back on the map yet again. Search Google maps for Meyersville NJ or My shop address 211 hickory Tavern rd, gillette nj 07933 aka Meyersville to see my area satellite style.

We have some folks that want to develop my little ole town, here are some links.

http://www.nj.com/starledger/stories/index.ssf?/base/news-2/117600641...

Also watch the NY times for an article about Meyersville possibly Sunday 3/14 or after that.

A couple of Meyersville people created a site for information. Check this out. http://groups.google.com/group/meyersville?hl=en

Its crazy Meyersville has been down this road before.. I am kind of sitting back & watching for now.. Learning about My towns politics

I will be back
Chairman

Friday, March 30, 2007

The Chairman Returns !

Howdy All !
I am still here & I do care.. I will have a blog update soon. Life has been crazy, getting married , work & life..


Please check my photo page on flickr (links on the right). You can see my next how-to with Rob & his butcher block top table on the right.


Today I am off to a chamber of commerce meeting (laughing) Yes, I am a chamber member someone has got to keep these people in check.

Please check out my updated website !
http://www.chairmanrestoration.com

Wednesday, January 31, 2007

Danish Modern, Mid century Modern Oh My ! Restored !

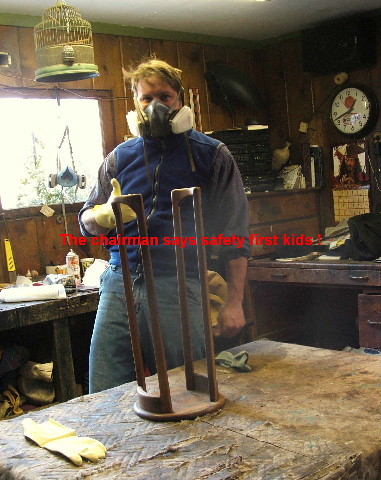
This weeks Piece !!Here is a nice & quick Job for the terminally hip, fatally cool crowd. I will delve into the wonderful world of Danish Modern furniture. No it’s not just about Chairs & Antiques with the chairman. Mid century modern stuff comes though the shop all the time ! I love the clean lines & working with teak.


Just a quick disclaimer: This job will require a good respirator & needs to be done in a well ventilated area. I will not be held responsible for the brain cells you will lose if you don't use a respirator & follow all the manufactures detail instructions on the finish you use.


Sweet now that, that's over.. here it is !

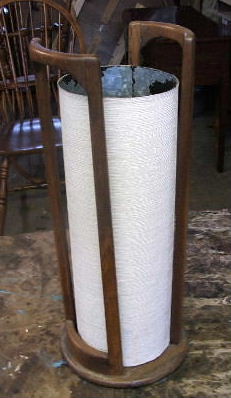
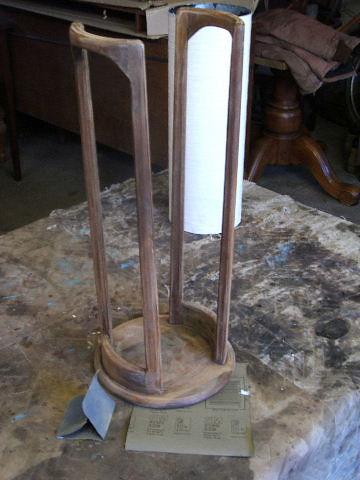
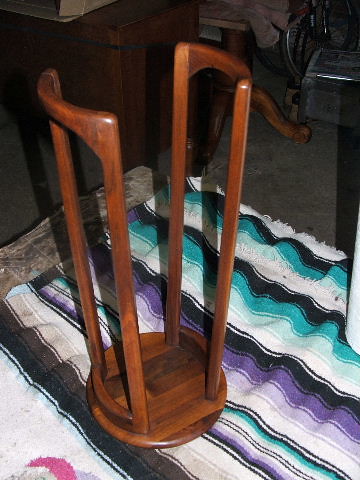
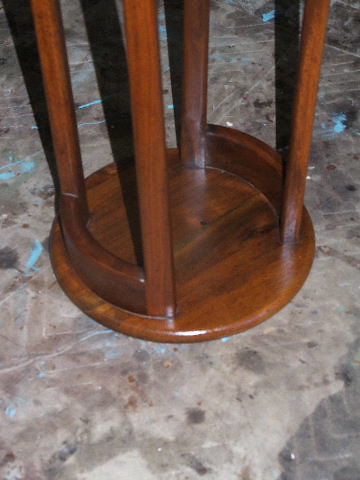
It's a very funky & unusual Danish modern Umbrella stand. I had never seen one before this. (It is for sale in my shop) Best of all I got it from the side of the road !


First, I like to clean the piece with denatured Alcohol & extra fine steel wool (0000) This will clean all the built up grime that's on your piece. Make sure your wearing your respirator while doing this.. After you've cleaned the piece, dry it with a paper towel.
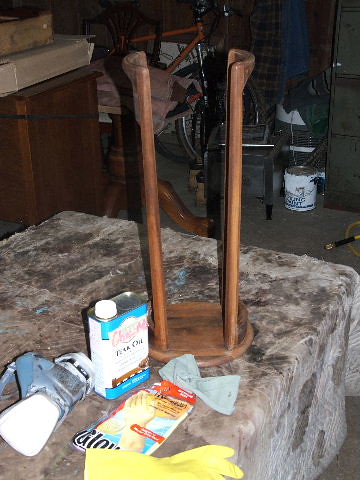

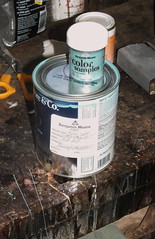


After it has dried I take 320 grit wet/dry sand paper & sand the pieces down. You’re looking to do a little more then scuff the finish. This will help get rid of the rest of the grim & prep the old finish for re-oiling. Now wipe all that dust off with a paper towel dampened with denatured alcohol.


Now that its prepped, let’s get to oiling ! For this piece I went with teak oil, it’s easy to use & the finish builds up quickly. I did a karate kid style process, Rag on rag off grass hopper.. Soak your rag & apply your oil (wearing your mask) Covering all the wood lightly making sure everything is damp. Let the oil soak in for about thirty minutes , then wipe the excess off with a paper towel. Pop your next coat on in about an hour following the same process.


I went with just two coats of oil on the umbrella stand. I let it dry for about 10hrs or overnight. Then as a finishing touch I added a coat of butchers wax, that will give the finish a little extra protection.


So while I waited for the wood to dry I cleaned the metal holder & repainted the inside. So all said & done here is the finished product !
If you have any question just shoot me an email chairguy5@gmail.com !


Friday, January 26, 2007

“I want them to look like this”, she said!


“I want them to look like this”, she said! As she showed me a page she had yanked out of Better Homes & Garden.

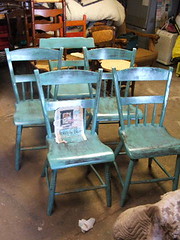
Trends from magazines & doing requests… I love it all… bring it on. This was the other job this week, a trendy yet stylish number on an old set of plank seat chairs. It was romance from the get-go, a song & dance, a wine & diner. Phone calls, emails, drive bys. It never happens on the first time (getting the job). It’s hard for folks to change something, so sometimes you have to walk them through it, do a little hand holding.

These chairs have been in her family for years. They had two or three layers of paint of for each generation. When we stripped them we saw anything from that 1920’s green to the dark blues of the 1940’s/50’s to the 80’s greens of the 80’s & finally just black for the last 20 years... Needless to say they were a bear to strip. I won’t even go into striping them, it's still a little traumatic for me & more so for my Uumpa Llumpa.

Having to wine & dine a job is not usual. After seeing so many pieces of furniture transformed over the years. I forget that most folks can’t see beyond what a piece is right here & now. They can’t see its potential future or what it can could become. That’s why so many pieces are lost to the dumpster or landfill. It’s easy for someone to just toss it & buy a new one, god for bid they think about.

Here is a quick funny tail from the shop. I jumped in my truck one morning to run to the store. Its garbage pick up that day. I drive by a house & spot a small table. I stop and look, it’s a sexy little Victorian era side table, long turned legs with a turtle shaped top. It ends up one of the legs is broken, but all the pieces are there. It’s an easy fix, so I grab it. Being a good OCD’er I bring it back to my shop & fix it that day, I polished it up ( it looked beautiful). So I popped it in my shop for sale.

Not more then a 4 days later a guy stops into my shop. I realize this is the guy from the house that I got the table from (cross eyed). He says; I am looking for a small table to replace one that was broken!
Being a good wise ass, I say I think I may have one for you… We walked into my make shift show room and I show him the table. I say I think you threw this out on Tuesday and , Hhe’s says yeah I had broken it. I tell him I would be happy to give it to him for the repair cost (much less then the resale price). He gets all funny, I think really embarrassed that he didn’t get it fixed himself. He then goes I never liked that table… keep it. Then he departed with out the table...

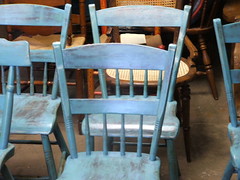
BACK to the blue chairs we glued and & we stripped. Next, We sanded and filled. The nice thing about a repaint is you don’t have to do as much detail work, especially since it’s an “antiqued” look. Doing an antiqued/distressed finish, you want all the dents & dings and some of the rough edges all that equals character & that what we're looking for.

The color, this was funny. When she said we decided on spa blue I thought to myself, sweet baby hey-zues what did I get myself into. Then I saw the picture & it made sense. So spa blue it was !

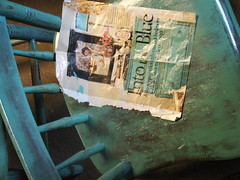
I decided to do a rag it on & wipe it off, approach (karate kid style)to the staining/painting of the chairs; Oh and a little dry brushing to temp the blend (love saying that), It’s the perfect way to create all the different depths in that antiqued finish. When you “wipe off” I use a damp paper towel & work the areas that would have been worn over the years. The seat, center & edges and the back spindles & side edges and don’t forget the front spindle (pictured) That always has the best ware. After the paint dries I usually hit all the sharp edges with 320 wet/dry sand paper doing so that we can quickly expose the natural wood.
Finishing... On this kind of finish I think it’s very important to throw a clear coat or two to protect the antiqued finish, it also guarantee’s it will last for a good long time. I like to go with a quick coat of a shellac sanding sealer (best over paint), then a couple of coats of satin lacquer. Please do a quick sanding between coats (400grat wet/dry), the 10 minutes it takes will make all the difference in the look & feel of the piece.
After they’ve dried for about 12+ hours, we take superfine steel wool (0000) & a very soapy mix of water then rub the chairs down & dry them off. This smoothes the finish out & gets rid of any over spray.

~Chairman


Monday, January 22, 2007

The Chairmans Project of the week.. Inlaid Settee re-glued baby


Here it is, the piece of the week !

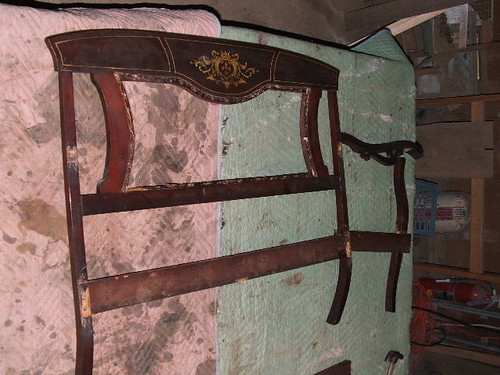
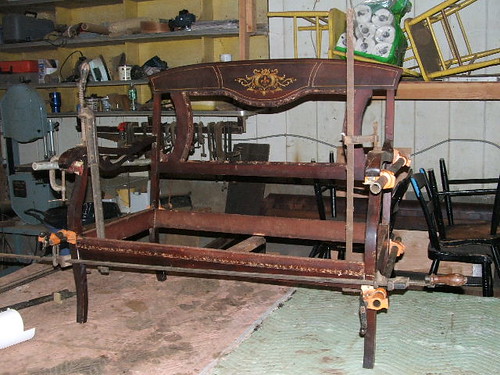
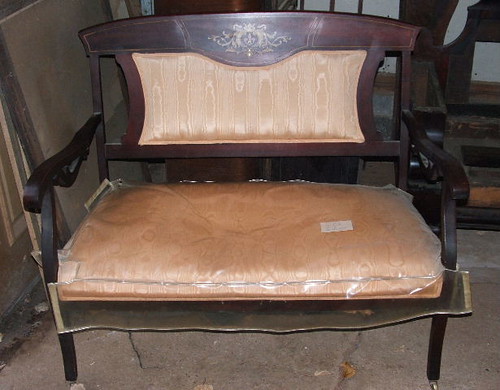
I figured since I am the Chairman why not start with a Chair for my first Blog project piece.. So we picked this up from a customer a few weeks back. Its a swell 1920's inlaided Settee. These pieces are always interesting to work on.(note interesting really means pain in the butt)


I am going to cover some of what was done to it today.. As you can see it came to us with its original plastic seat cover. Its so funny that folks really do use these things.. I thought about ebaying it(plastic cover), but then decided to toss it.
Anyway, this will be a complete restoration job, repair, re-glue & then have the Upholsterer re-spring it & add the new fabric.


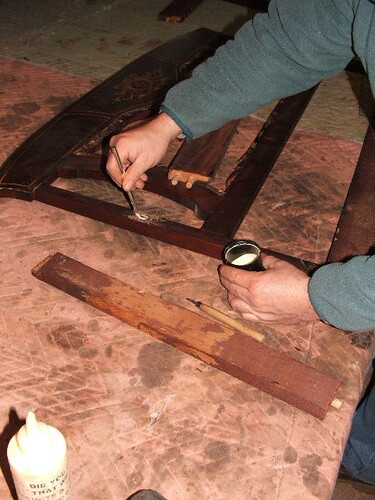
The first part of the process is to do the repair. What I do believe is if your going to do it , DO IT RIGHT. By doing it right, I mean you need to start by re gluing, No not with gorilla glue, no Sheetrock screws or nails, just good old fashion brown glue a few good clamps.


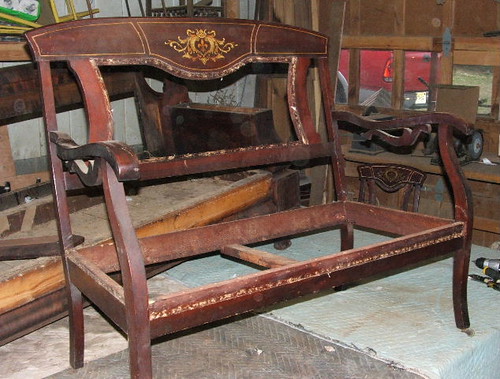
As you can see we removed all the fabric first one of the biggest chores. Can you say 8 billion tacks, this is were your umpa lumpa comes in handy or first mate tell him/it or her to do it. Its really important to do this if your reupholstering the piece. This may be the last time you can re-glue the structure correctly for many years. If you don't you'll end up with a beautiful, yet wobbly piece of furniture..
Here is how I like to do it..
We disassemble the whole piece. Yep take it apart, if its an old piece it should come apart pretty easy. You'll need a nice soft/rubber mallet to help loosen those old joints & maybe a vise with a little leather in its jaws. Also watch out for nails & screw from any 1/2 done repairs from the past, nothing like blowing a joint up cause some clown put a nail in it. The only way to reapir a joint in anything is to glue & clamp it ! Nails & screws are a short term fix.


After I take it apart, I like to scrape off all the old glue make sure the holes & dowels are pretty clean. An old chunk of glue in a dowel hole could jam you up later. Also I like to put a little slot in the old dowels. The new glue will create an air pocket inside the joint that could damage the joint or make really hard to clamp it later.


So its time to glue ! "the home stretch", this is good cause ,I am already gettting bored. So this is the fun part wooo whoo ! Grab your plumbers brush & cup of your glue of choice & start gluing ! Make sure you get glue on both parts of the joint. Not to little & not to much.


After you have applied glue to each joint its time to reassemble it. Pop it back together looking for a loose fit. You will have glue dripping everywhere, no worries more will come when it gets clamped. Have a paper towel & water handy.

Clamping I like to start with the sides.. Pop one on either side & slowly start to tighten them , Go from side to side, closing those gaps evenly. Take your time & make sure every thing is even. If its not you could end up with a cockeyed chair.
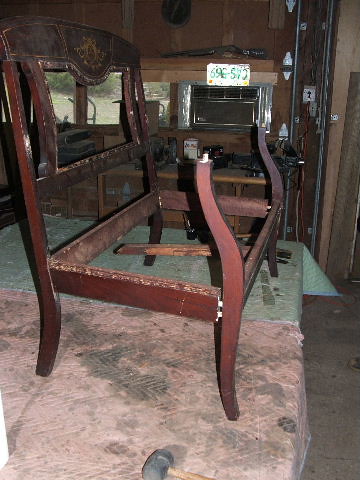
So below you will see the clamped piece, "frankensteined" On this piece we used 7 clamps everything went back together perfectly, we added the corner blocks back in & put it on a level floor. The clamps will come off in about 10 hrs or so.


Clamped & ready


So that's part 1 Of my inlaid chair saga, man this blogging crap can be a pain in my ass. The picture adding & writing is crazy, I need to get away from the puter & get into my shop where I know its safe. If you have any questions please post them or shoot me an email chairguy5@gmail.com
~Chairman


Sunday, January 21, 2007

Stickley Brothers Desk Lives Again !

Here Is a little taste of some of what I do..
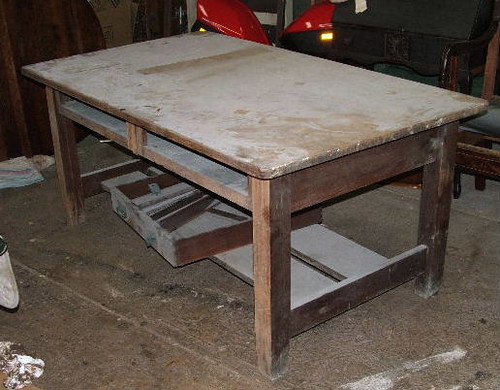
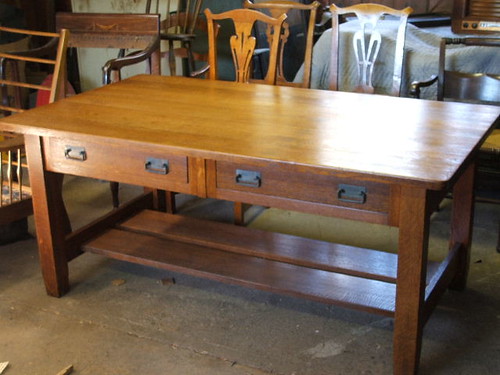
This was a worn & abused Stickley Brothers "quaint" desk. I found this outside a building that was to be demoed in Jersey city. We loaded her up into my truck. then 6 months & 4 days later it was beautiful again (took 6 months of looking at it & 4days to restore it).


Just think of how many people walked by this & never knew it could sell for 2400.00..CHeck out some of my other work here as well http://flickr.com/photos/chairmanrestoration/

The Original Chairman & Chairboy

Welcome !

This is the beginning or the end, depending on if I keep up with my plan.

Ah yes the plan.. What could I guy with a name like the "The Chairman" have to say or write about..

Lots baby lots.

I can ramble, bitch & moan with the best.. I have all the bridge burning, hand grenade throwing stories that a 37 year old can expect to have.. Yeah yeah yeah

Come on that's not really why I am here. Much like the picture on the right this is the beginning of a new chapter for me. Yep, That's me & the original Chairman (my old man) back in the early 80's . Back then I was the chairboy the reluctant helper, hating every time my father yelled come on your going me. That always meant I would be doing so form of labor ,whether it was packing boxes or loading a truck with the contents of a house we had just bought.

Don't get me wrong i loved it ! From an early age I learned how to haggle & do the antique dealer shuffle.. Buy cheap & sell high.. Like my father always said "you gotta hustle kid" or "Double your money or don't bother". My favorite was "I am always thinking" (he'd tap his head) were the next buck was coming from".

Oh wait ,yeah, so the plan, my angle, my reason for this blog.( i get side tracked easily) Aside from driving readers crazy with my poor spelling, grammar & punctuation I am just here to help !

I am looking to blog about the work i do, show folks its pretty easy to restore a piece of furniture or do a simple repair to a chair. So if I stick with my plan I should have weekly updates of pieces I am working on as well as some pictures. I will also be happy to answer any one's questions about Antique & furniture repair/restoration. So if you have any question please let me know..

No worries I will be sure to post random & wacky stories about my customers. Like the time one told me she knew the differences in colors (jersey accent), because she was a hair colorist ! I may also brag about the chair you tossed out on the curb, that made me a quick 200 bucks.. see not much to blog about..

~Chairman